User Guide
Welcome to Ripple Junction. Thank you for partnering with us.
Please select from the options below to find the information needed.
1. Creating an account
Companies who wish to partner with us are required to register for a wholesale Company Account. By doing so, Ripple Junction can guarantee special pricing, special deals on unique licenses and provide additional one-on-one support to meet your needs.
To access our catalog with 1,000’s of designs, please access the registration page https://store.ripplejunction.orbalab.com/company/account/create/ and complete the necessary data.
You will need to have your Company’s Tax ID as well as any Reseller certificates on hand to upload at the time of registration. In case you hold a registry in more than one state, you may upload multiple reseller certificates at once during the registration process. We accept the following formats for the completed certificates: .PDF, .DOC, .DOCX, and .ODT.
To complete the registration, you will need to provide the following information listed below.
- Part 1. Company information.
- Company Name. This is the name of your Company.
- Company Legal Name (optional, in case your Company name differs from the Legal Entity’s name).
- Company email. This email will be registered as a point of contact for the Company but will not be associated with the Company Administrator Account. The Company Administrator account will be provided separately in the registration process.
- Tax Identification Number. If your Company is registered in the United States, please provide your Employer Identification Number (EIN), also known as Tax Identification Number. If you are a registered business in Canada, please provide your Tax ID Number (also called a Business Number).

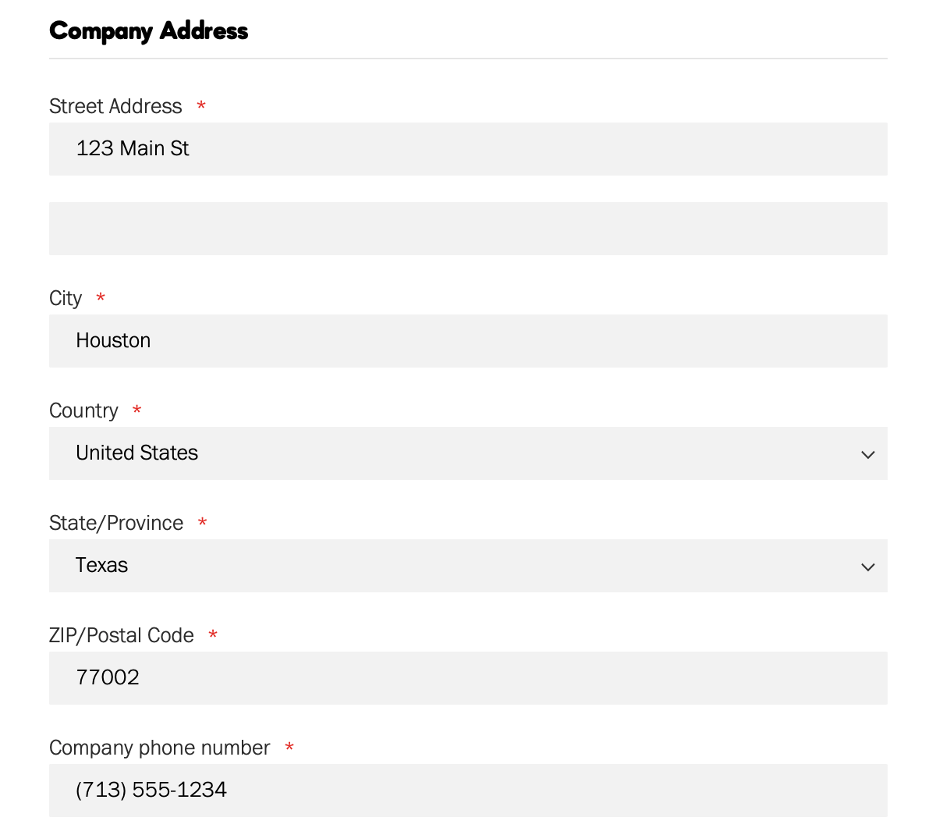
- Part 2. Company address.
Please provide your Legal Entity’s address. This address does not have to be the same as your physical locations where your orders will be delivered. You will define your delivery addresses once your account has been approved
- Step 3. Company administrator.
Please enter the following data for the person who will be registered as the Company Administrator. Once your Company Account Request has been approved, the person designated as the Company Administrator will be responsible for managing all other users for your Business Account.

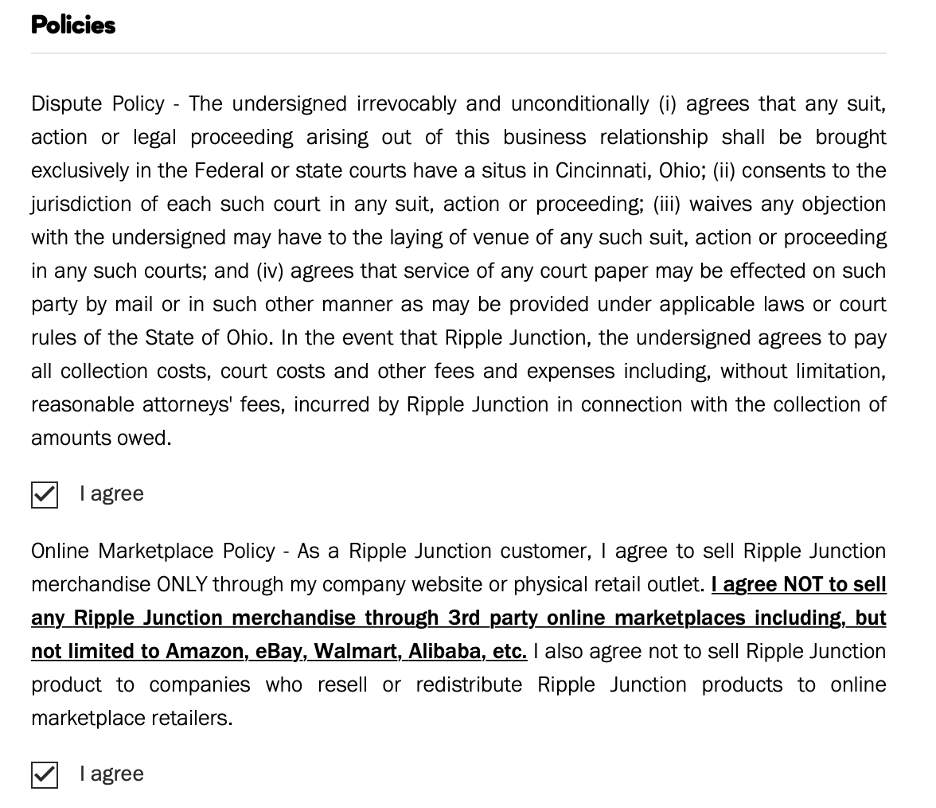
- Step 4. Policy Acceptance.
Please be aware that without accepting our Terms and Conditions for disputes and Terms and Conditions for Resale we cannot approve your application. Ripple Junction, do not allow the resale of products on Marketplaces such as Amazon, Walmart, eBay, Alibaba, Allegro, and any others. Doing so will result in an irrevocable suspension of your Business Account. We also do not allow the resale of products to resellers who sell on said Marketplaces, under the same conditions of suspension.
- Step 5. Resale Certificates upload.
For us to exempt your purchases from state sales tax payments, we require a valid Resale Tax Exempt Form for the State where you are registered. A form is considered valid if it is active and not expired. Unfortunately, we cannot accept expired or inactive certificates to guarantee tax-exempt purchases.
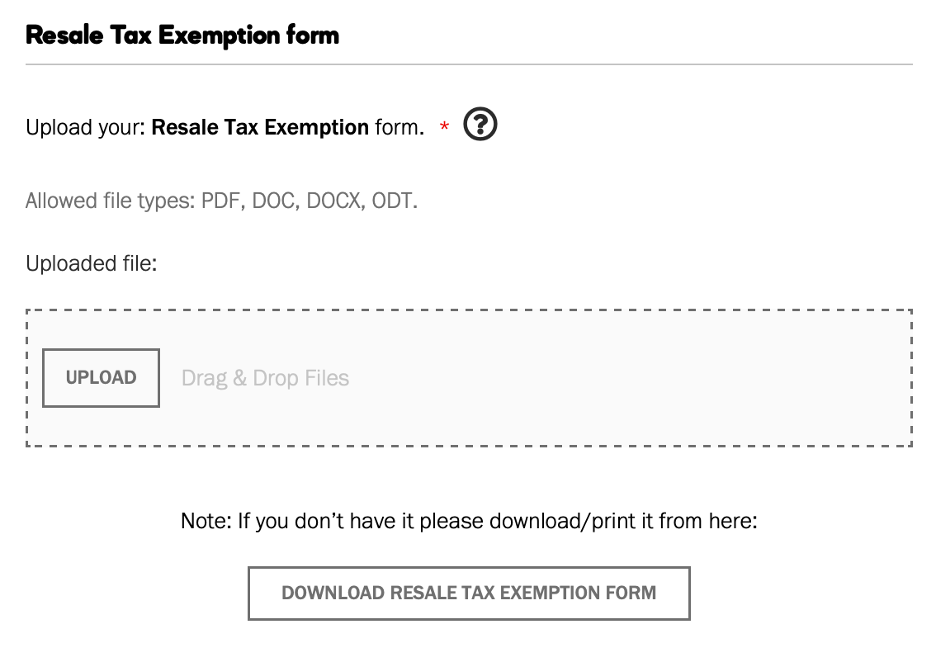
You will be able to upload multiple documents at the same time if you have more than one Resale Certificate. To do so, please select the UPLOAD link. From there, you may select multiple in your file explorer window. Simply hold down the CTRL key as you click (Command if you are on a Mac).
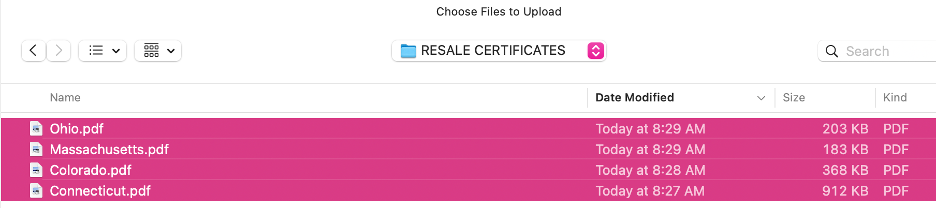
Once you confirm the upload, the files will start transferring. All files are uploaded individually and will generate an error if any cannot be uploaded. Errors will not block other files from being saved.
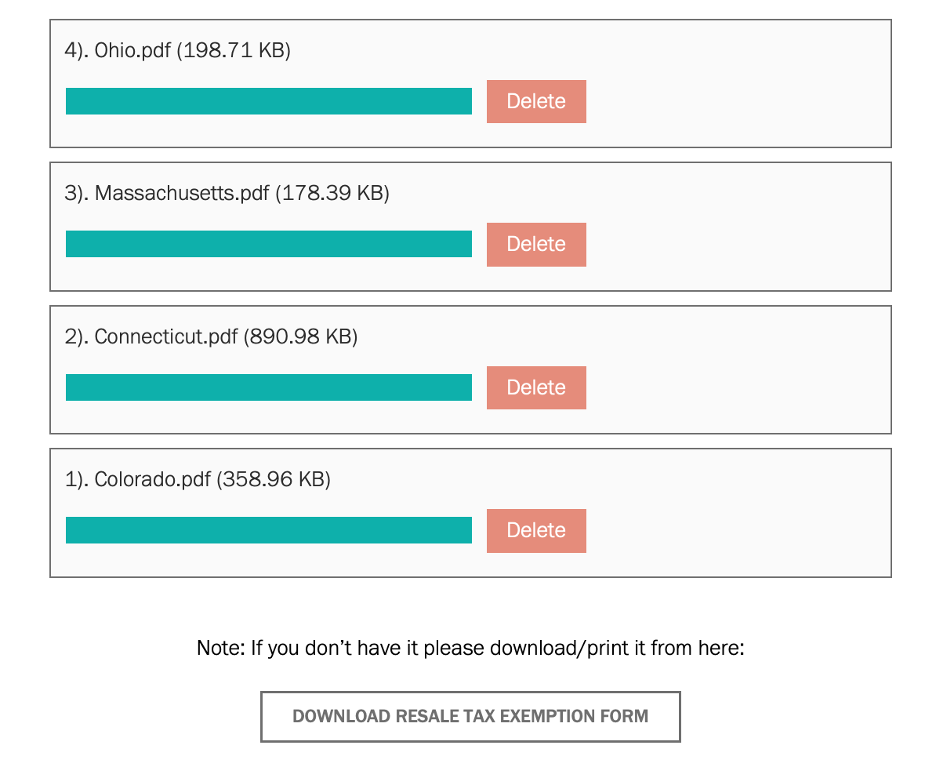
If you do not have an available Tax Exemption form, you may download the available templates from here. Certificates provided are for the United States only, if you require an international form, please contact our Customer Service team at (513) 759-8243 or email us at help@ripplejunction.com. Our team will be happy to assist with any needs.
2. Account approval process
After you submit a request to become a Ripple Junction Partner, our team will verify all the information provided during the registration process. During the validation process we will check your Company Registration, your Resale Certificates and all Company data provided.
The decision approval time may take anywhere from 48 to 72 business hours. All applications submitted after noon U.S. Eastern Time will be reviewed starting the next day. All applications submitted starting Friday after 11 a.m. U.S. Eastern Time until Sunday 11:59 p.m. U.S. Eastern Time will be reviewed Monday morning during U.S. Eastern Time business hours.
If any information cannot be verified through the approval process, one of our Customer Service Managers will reach out to the Company Administrator email provided during the registration process. Additionally, you may receive a call at the phone number provided if we cannot get in touch via email. Our team will hold applications for up to 2 weeks (14 calendar days), at which point, if additional information cannot be provided or confirmed, your application may be rejected.
Once your application is approved, you will receive communication with a link to set your user password. The email will be sent to the Company Administrator email provided during registration. The link will be active for 2 hours for security purposes. If the link should expire, please follow the instructions to reset your password to get a new link at your convenience. You may begin to use your account immediately and can place an order at this time.
Should your application be rejected due to insufficient information or any other reason, the decision may be appealed. Please submit the appeal in writing directly to help@ripplejunction.com. You may also call us directly at +1 (513) 759-8243 to start the appeals process. Please do not submit another registration request. Please be aware you may be asked to provide any additional supporting documentation during the appeals process.
RJ reserves the right to approve and/or reject any account at any time.
3. Managing your Company Account
Once you have been approved for an account with us you will be assigned a unique Company Identifier. This identifier will be used for enabling Company Orders, Billing and any other transactions which go against your Company Account.
The first User Account created for your Company Account will be associated with the Company Administrator email provided during registration. To begin using your account, please log in with this email and password which was set upon Account Approval.
All Company Accounts are created with predefined Employee Roles & Permissions which we believe will help you manage additional accounts. You may create any additional permissions as needed. To read more on this subject, please see Roles and Permissions.
As the Company Administrator, you will be granted full access to manage, update and edit your Company Information directly from the web portal.
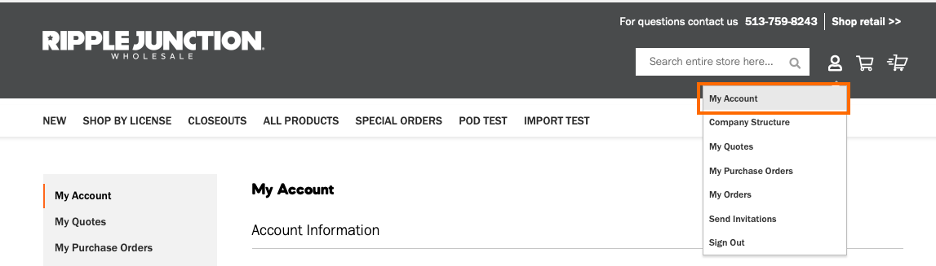
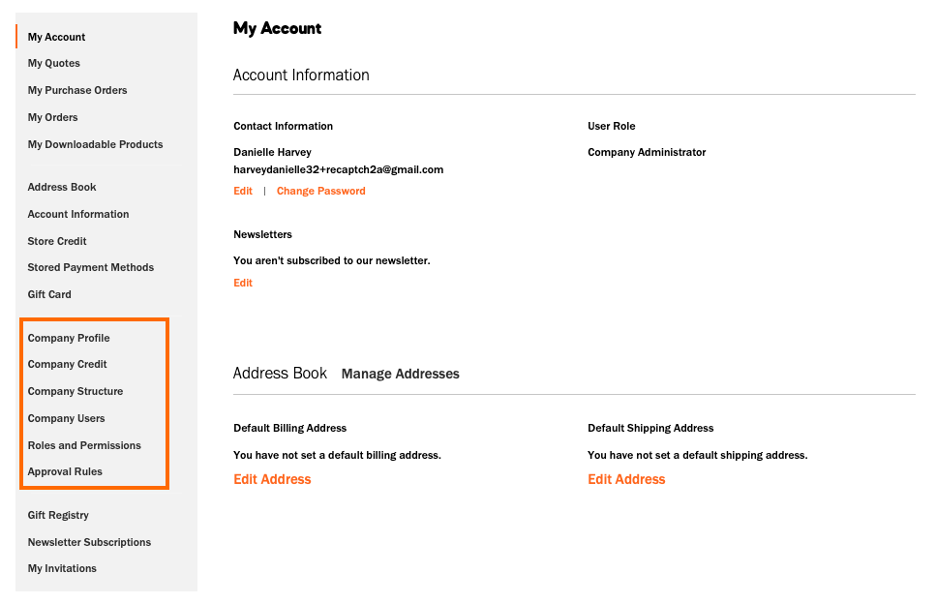
After your initial login, we recommend verifying your Company Information and updating any details which may be incorrect or outdated. To access your Company Information, you may do so by clicking on the user icon in the header and going to “My Account.” This will take you to the general Account Portal. From the Account Portal, in the left-hand menu, you will be able to access all sub-sections about your Company Account management.
3.1 Company Profile
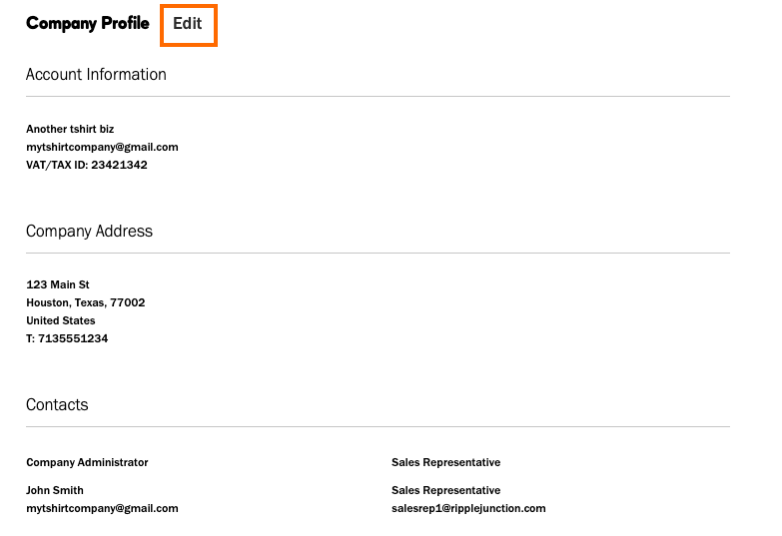
To manage the General Company Information, please access the Company Profile menu.
From in here, you will be able to do the following:
- Edit Company Name & Legal Name
- Add/update your Tax Identification Number
- Edit/Update the Company Address
To edit any of the above-listed details, please click on the “Edit” link next to the header. Once you update the information, simply save the form. Our records will be automatically updated to match the information provided.

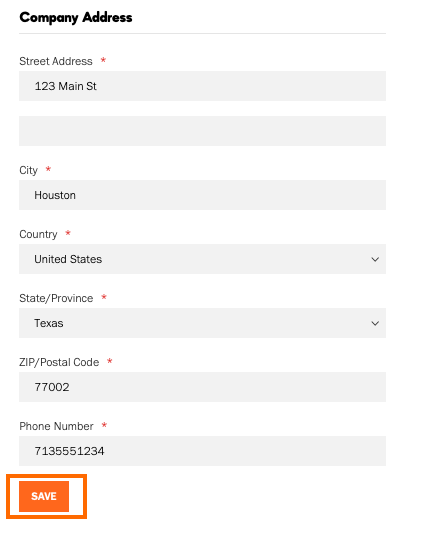
All fields indicated with an asterisk (*) are mandatory and cannot be blank. You are not required to change all the fields if any one of the items should be the only one updated.
You will also be able to see information regarding your Company Account to include:
- Company Administrator name & email
- Contact information for the Ripple Junction Sales Representative assigned to your Account
- Approved Payment Methods
- Approved Shipping Methods
While these items may not be edited through your Company Account Portal, if any should be changed or you feel any are assigned in error, please contact us at (513) 759-8243 or email us at help@ripplejunction.com, to request a change. Note that not all changes will be approved and some changes will require additional time to review.
5. Managing Roles and Permissions
As part of the new Company Portal, our goal is to allow you to manage your Company and Employees in an easier, fully automated manner.
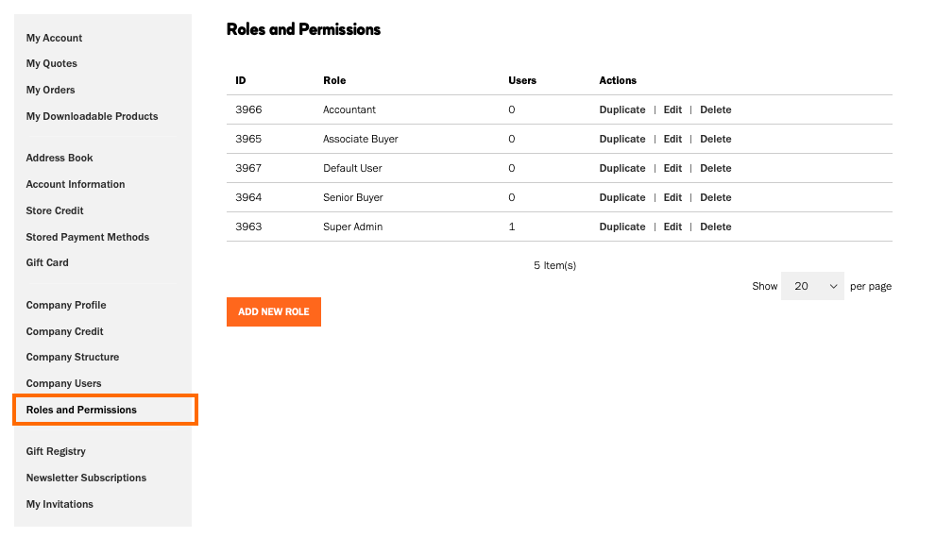
All new Company Accounts approved, come with 5 pre-curated Roles which you may use or edit as you see fit. You may create additional Roles with alternate permissions should you need them.
You may access your Company’s Roles and Permissions by navigating to the side menu in your Company Portal. Here, you will see a list of available roles.
To view an existing role’s permissions, click “Edit” next to the role. This will open a new view with the permissions tree.
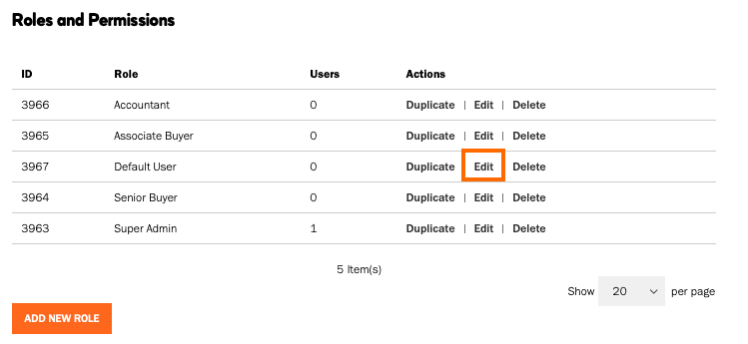
To grant or remove specific permission, please check or uncheck the checkbox for the permission.
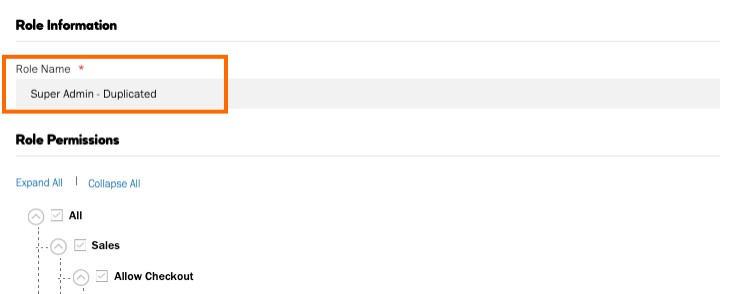
You may also change the role name by editing the field name “Role Name.” Once you are done editing the role, save it by clicking “Save” at the bottom of the page.


Note: when adding or editing existing permissions, if the parent permission is granted without granting any child permissions, it could potentially result in the user seeing a menu option that leads to a non-existent page. To prevent this from happening, any Top-Level parent permission for any of the following should have at least one child permission granted, otherwise, it is recommended to remove the permission altogether:
- Sales
- Quotes
- Order Approvals
- Company Profile
- Company User Management
- Company Credit

If you would like to create additional roles, select the option to add a new role. This will open a page with a blank permissions tree where you will be able to select the specific options for that role. Once you are done creating the role, give it a name and save the role. It may now be used to assign an employee to it.
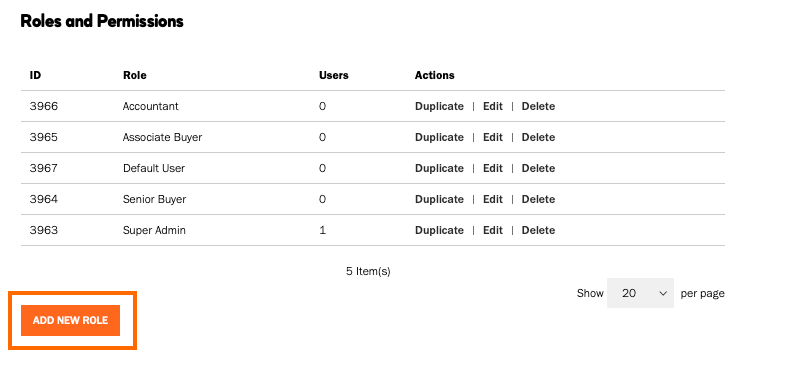
Alternatively, if you prefer to start from an existing role to edit some of the permissions in the case that there isn’t an existing role that grants the user the specific subset of permissions to cover the need, you may duplicate an existing role. This will in turn open a view with the same role permissions as the role duplicated. Select or unselect the permissions needed, change the name of the role and save it as a new role.

6. Managing Employee Accounts
The Company Portal will allow you to manage all Company Employees directly from there. It is recommended that all Employees hold an individual User Account which they will use to log in, place orders, view orders, track orders or download invoices, among other activities.
We strongly discourage the use of shared employee accounts, however, with the simplicity of the Company Portal, you will have full control over how and what Employee Accounts are created.
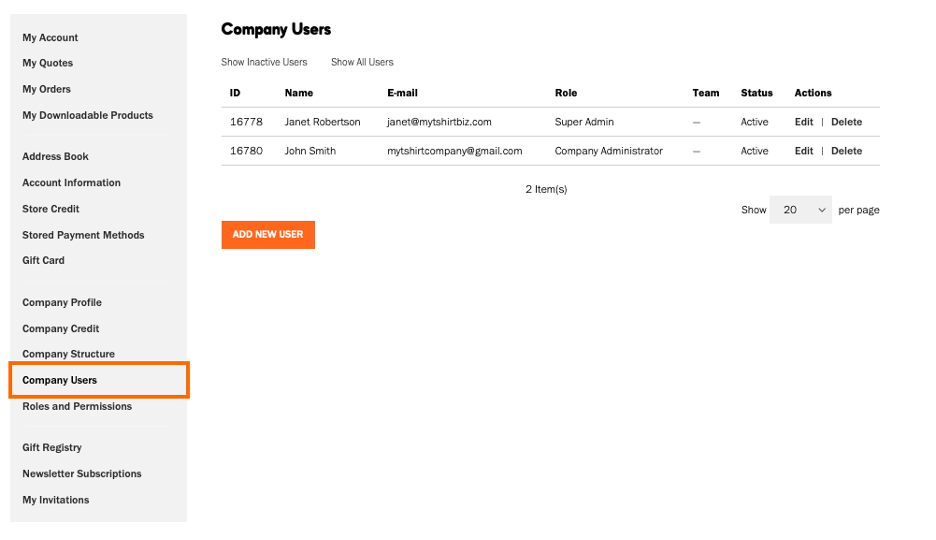
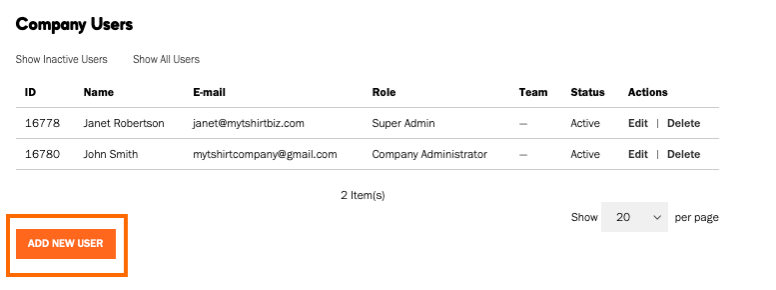
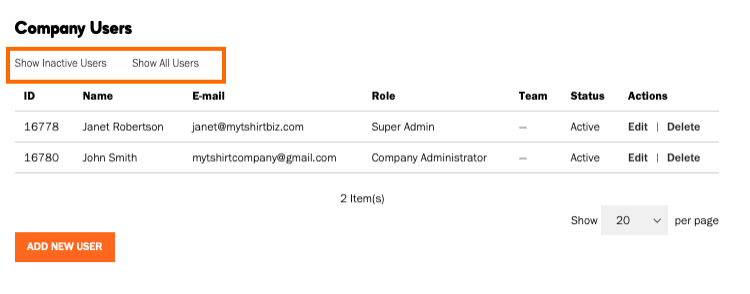
To view existing Employee Accounts or to create a new Account for an Employee, navigate to the Company Users section in the Portal. Here you will see a list of existing accounts and have the option to add a new user or edit and/or delete any existing users.
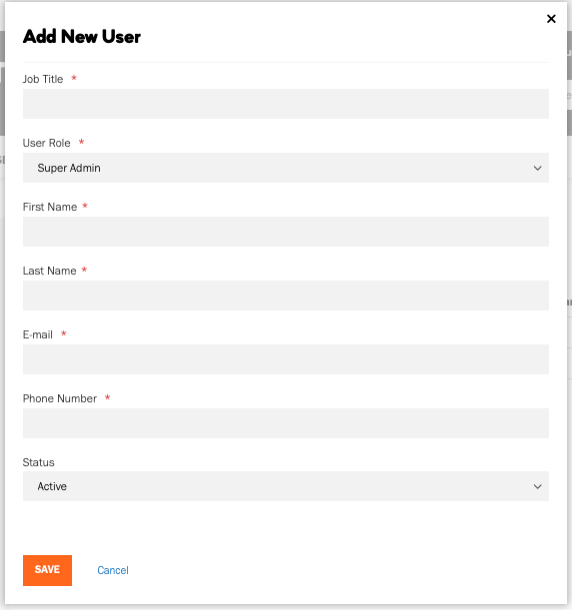
To create a new account, click on “Add a new user.” All accounts must be linked to a Role. The Role will define the permissions for the User (read more regarding Role Based Access Control here).
This will open a pop-up where you will be asked to provide basic Employee information. All fields indicated with an asterisk (*) are mandatory and cannot be blank.
All information provided will be stored in the Platform with the Employee’s User Account. They will have access to edit their personal information after they log in. Based on the role assigned, the Employee may or may not have access to specific areas. The role can always be changed at a later date.
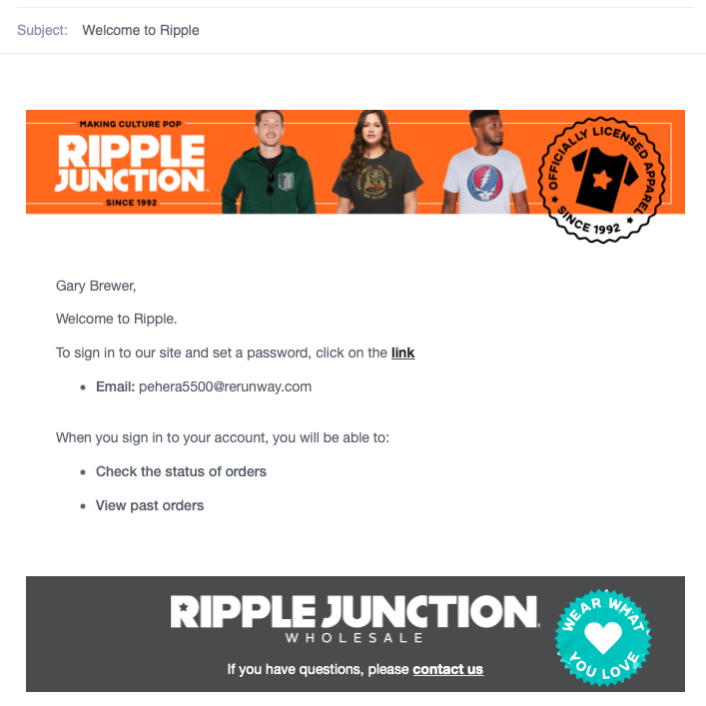
Once the form has been completed, save the information. The employee will receive an email with a link to set their password. The Employee is responsible for checking their inbox and setting a password.
The link will be active for 2 hours for security purposes. If the link should expire, please ask the Employee to follow the instructions to reset their password to get a new link at their convenience. They may begin to use their account immediately after this.
After saving, the account will now be visible in the Company Users section as well.
You may edit Employee Accounts at any time to change their status, update their email or update their Role. To edit an account, find the account in question, and click Edit. This will open up a pop-up with the Employee’s information.

Update the necessary details and save. If you are inactivating the Employee’s account, the Employee will be notified of the change at the email provided. The Employee will not receive other communication for Role changes, or name or email changes.
It is highly recommended that all Employees are deactivated immediately after they are no longer working with you. As a Company Administrator, it is your responsibility to ensure Employee Accounts are kept up to date.
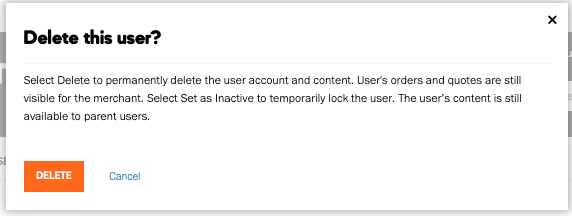
It is discouraged to delete Employee Accounts; however, the Portal does allow you to do so. Deleting the account may result in the accidental deletion of data or traceability for Employee actions. It is recommended that the account be deactivated instead. To delete an account, click on Delete next to the Account. You will need to confirm the deletion.
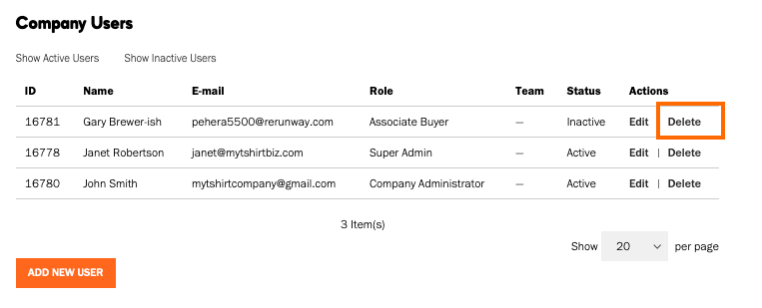
In the Company Users view, you will be able to filter by Active, Inactive, or All users. If you have inactivated a user and don’t see them on the list, click on the option to see Inactive or All users.
7. Managing Company Structure with Teams
A more advanced option available through the Portal will be that of Employee Teams. Teams represent a sub-division of your Company (i.e. your sales team).
The structure of a company account should reflect the purchasing organization, whether it is simple and flat or a complex organization with different teams for each subdivision and division of the company.
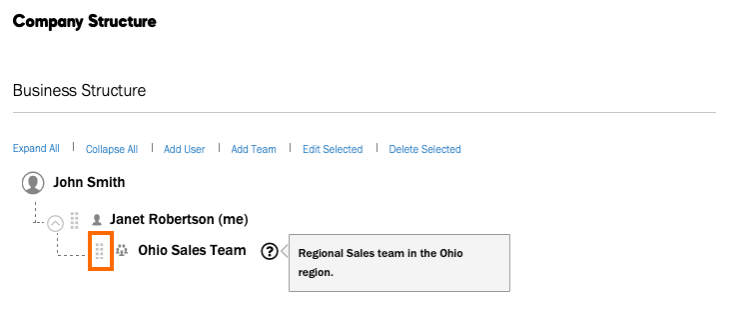
To view existing Teams, navigate to the Company Structure menu option.
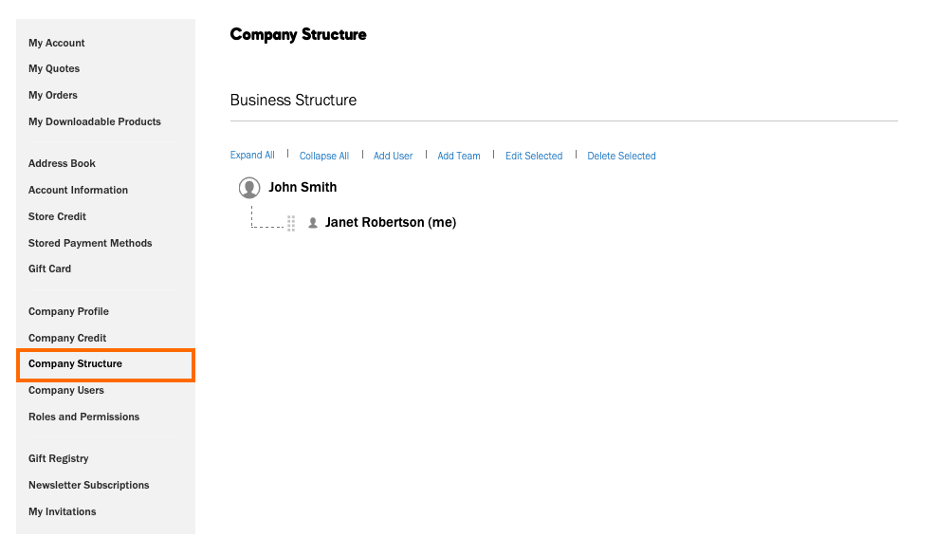
Here, you will be able to create a new Team or move a user between Teams.
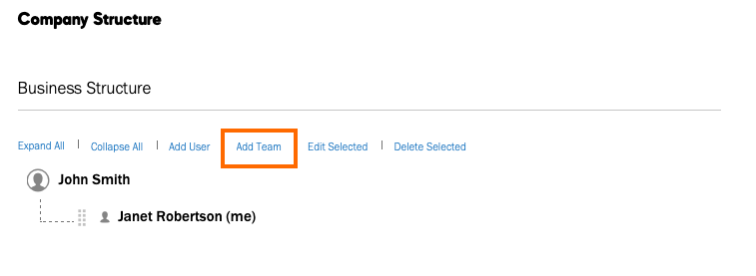
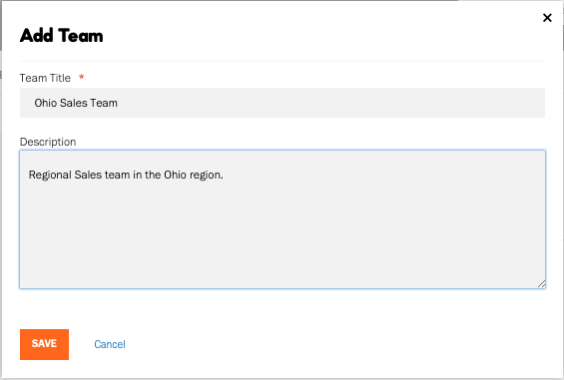
To create a new team, select the “Add Team” option. This will promt you to give your Team a name, and there is a space provided for an optional description. Here, it is encouraged to add a few words of the Unit, Sub-Division or Organization the Team will represent. This can be used for a later reference or for another Employee’s information regarding the Team.
Once the Team is created, you may add a user directly from this page and assign them to a Team. Alternatively, you may also assign existing users to the Team.
To assign a user to the Team, simply drag the user and drop them on top of the Team name. This will automatically create the hierarchy that represents your Organization.